
Reworking on any project or proposal wastes your valuable time and money. So, default templates can be customized for various purposes and audiences which can save your time.
Templates have a unified appearance, which makes it easier for your team to locate important information quickly. With the templates, you can create the framework of elements needed to complete the report.
To avoid this reworking in the dynamics 365 field mapping, you can save the default templates in the CRM.
Once you set the template as default, it will automatically load the template in your CRM.
Now, let’s see how you can configure the default template in Mappyfield.
Step 1: Navigate to MappyField 365
Select “MappyField 365” from the Dynamics 365 dashboard or app list.
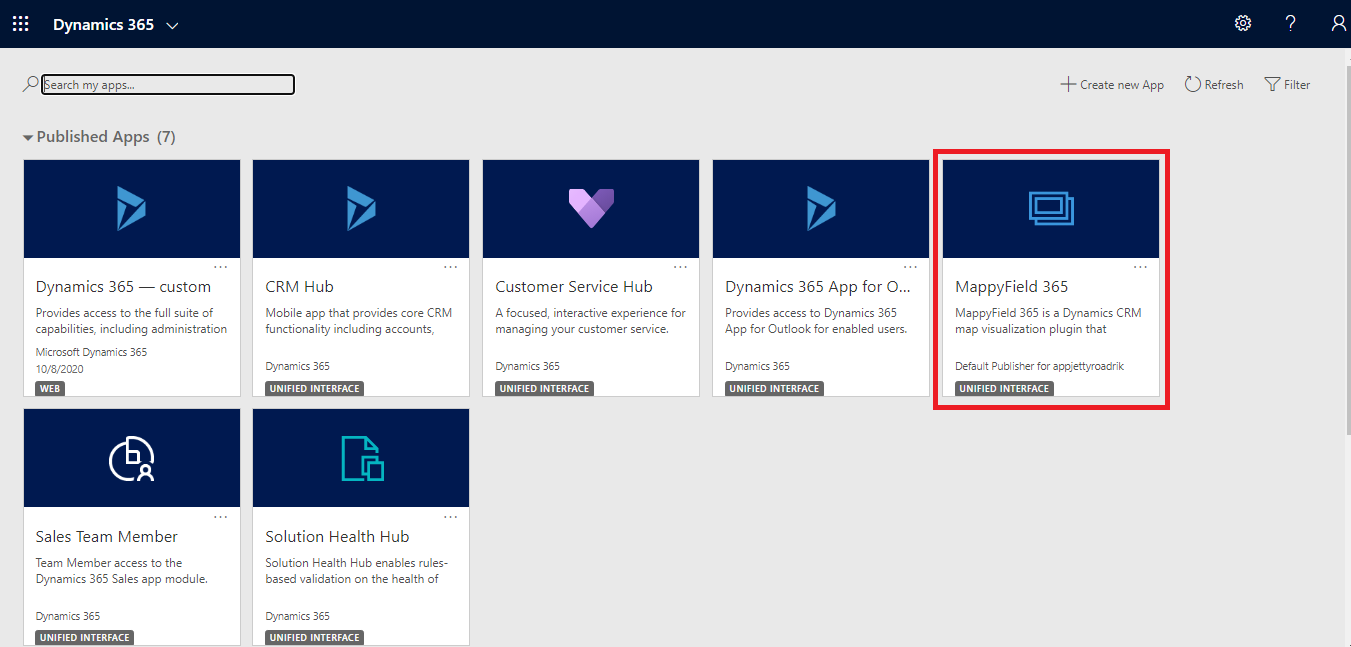
By default, you will be navigated to the “Map view” of the MappyField 365.
Step 2: Plot entity records on the map
You can plot the entity records on the map. Suppose, you want to plot the records of the “Accounts” entity for the “Texas” area. So, you need to select the entity and its view and you need to insert Texas.
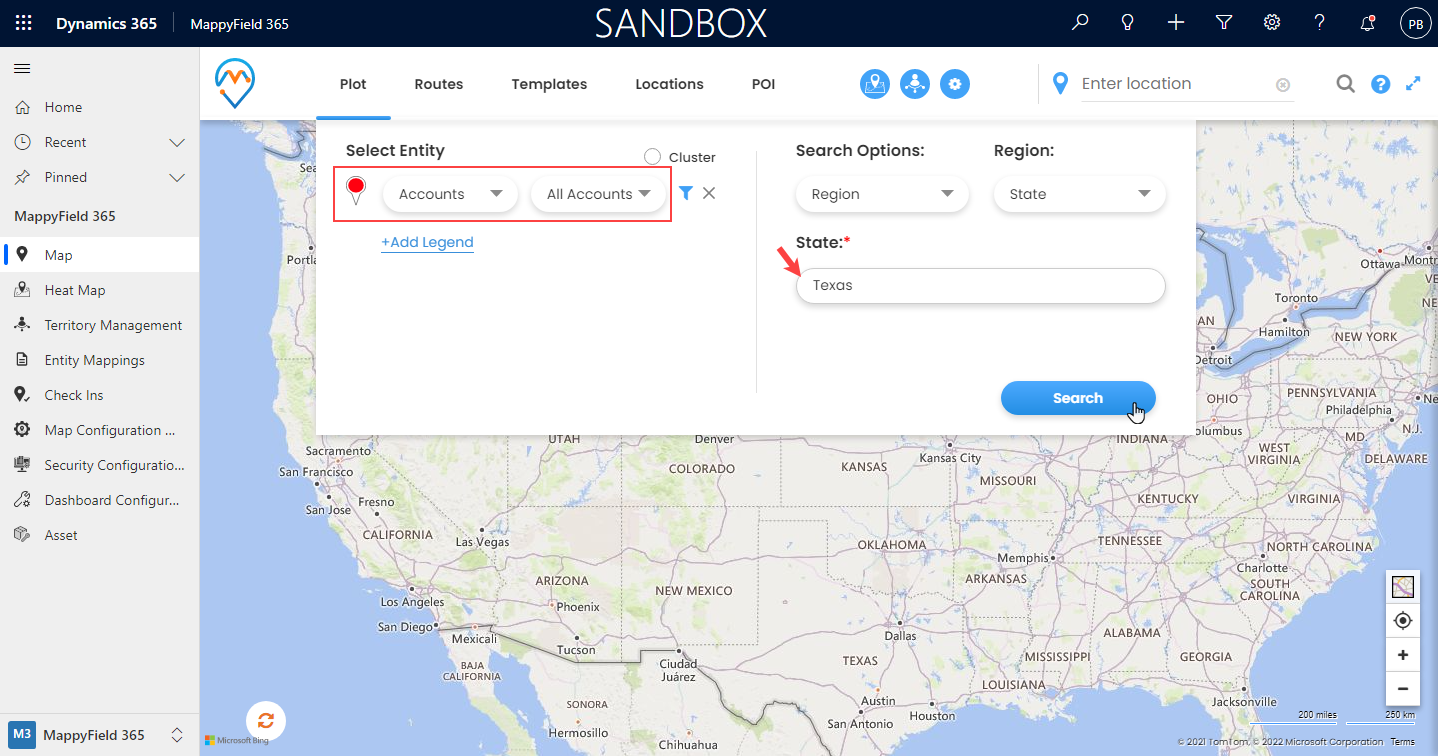
After inserting the entity and search option, click on the Search button to plot the records on the map.
The entity records are plotted on the map.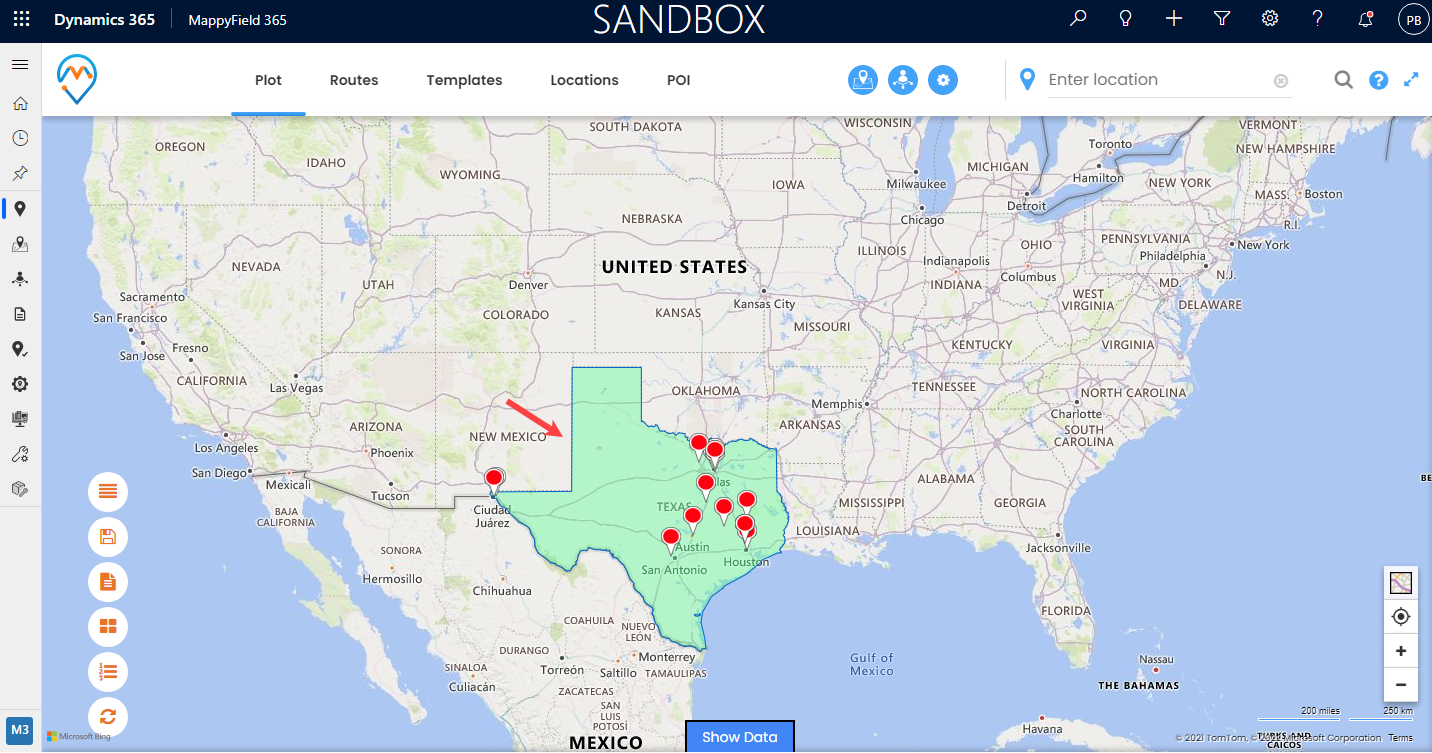
Step 3: Save as Template
Now, after plotting data on a map of dynamics 365 field mapping, you can save the plotted records on the map as a template form. For that, you will find the “Save Template” card from the Advanced Options panel of MappyField 365.
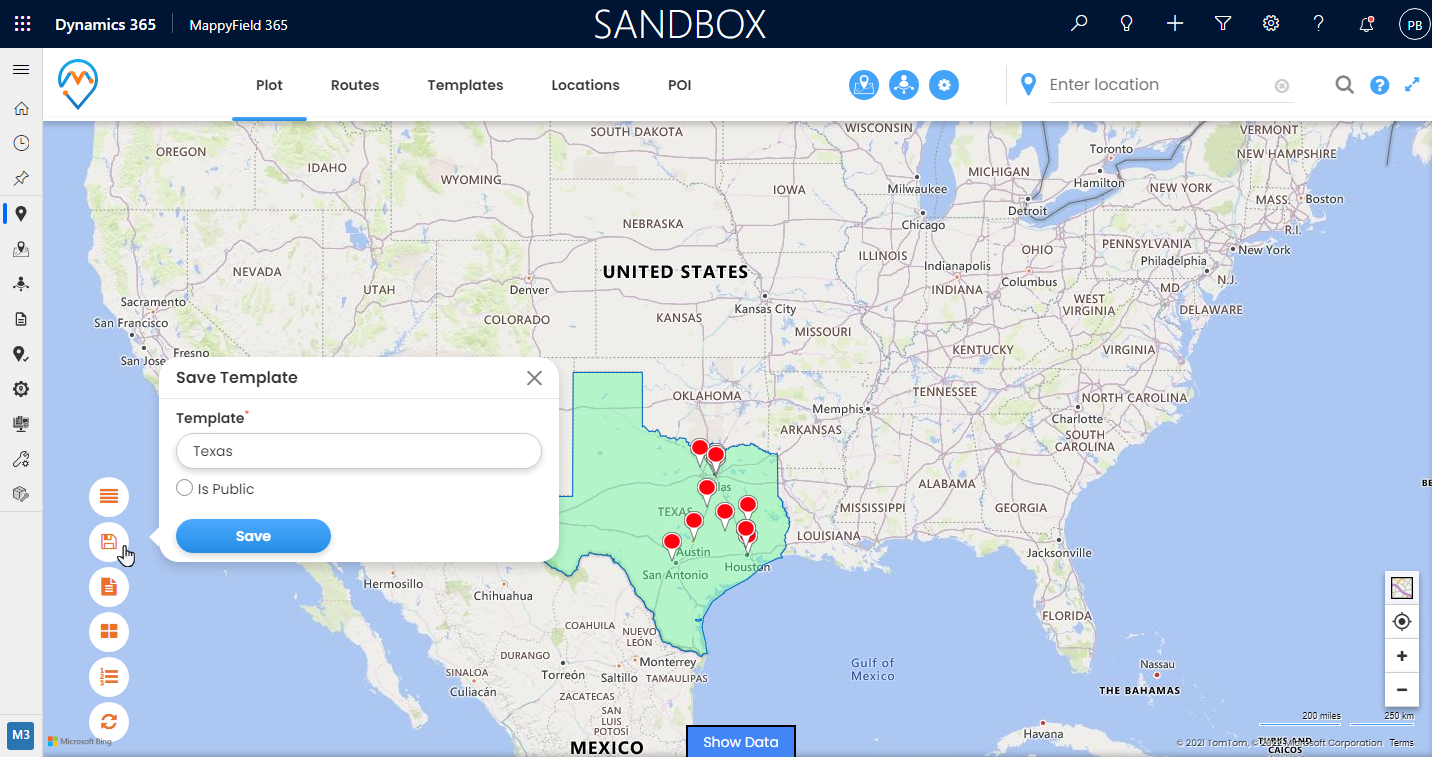
Now, by clicking on the Save Template icon, you will see the popup to insert the template name and its visibility.
- Template: Insert the relevant name of the template.
- Is Public: If you want to share with all the concerned CRM users, tick the “Is Public” option else keep it disabled to make the template private.
Now, click on the Save button to save the template. You will see the saved template from the “Templates” menu from the header.
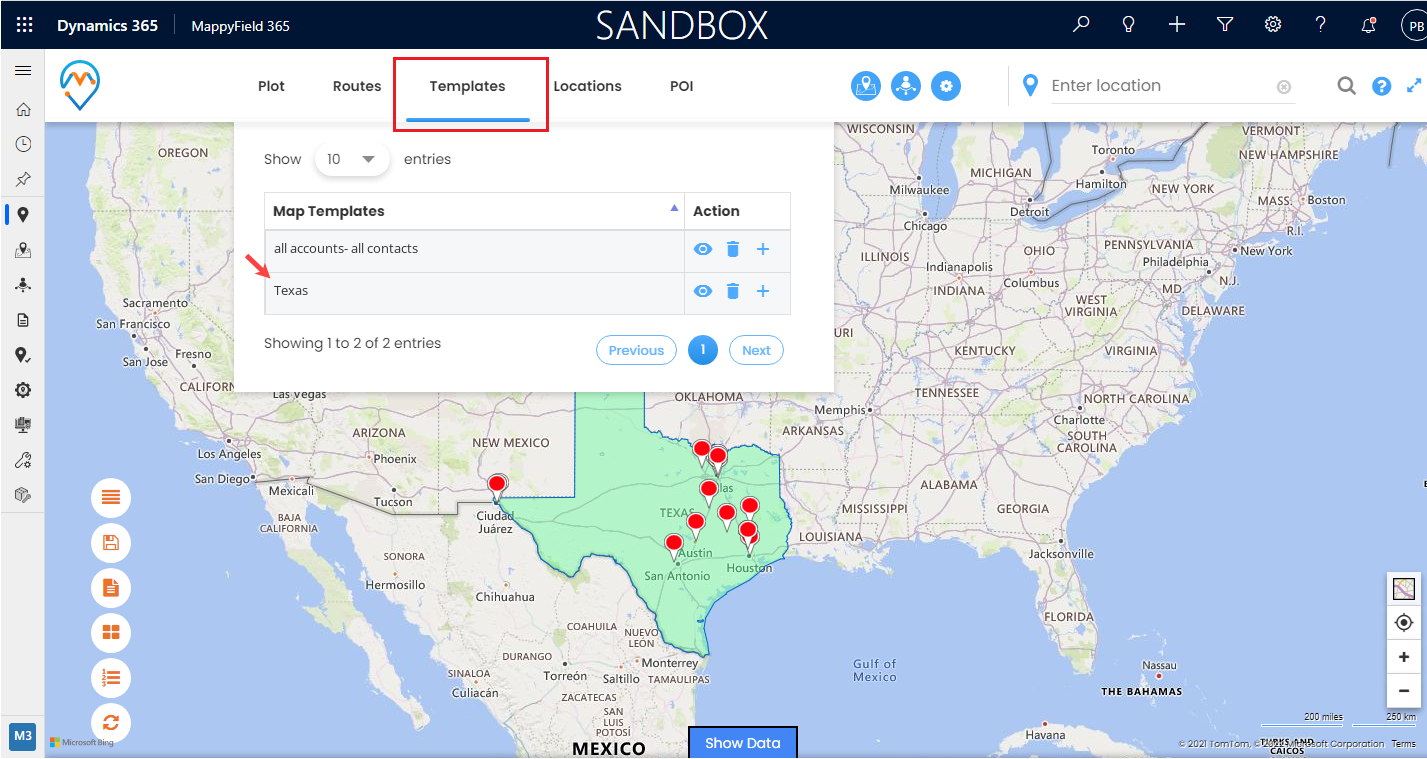
Step 4: Set as a default template
You can see the saved templates from the “Templates” menu. There will be 3 actions that you can perform on the template:
i) View: On clicking the ‘view’ (eye) icon, the map will be loaded with plotted records as per the template.
ii) Delete: On clicking the ‘delete’ (trash) icon, it will delete the template.
iii) Default template: On clicking the ‘plus’ icon, it will set the template as default.
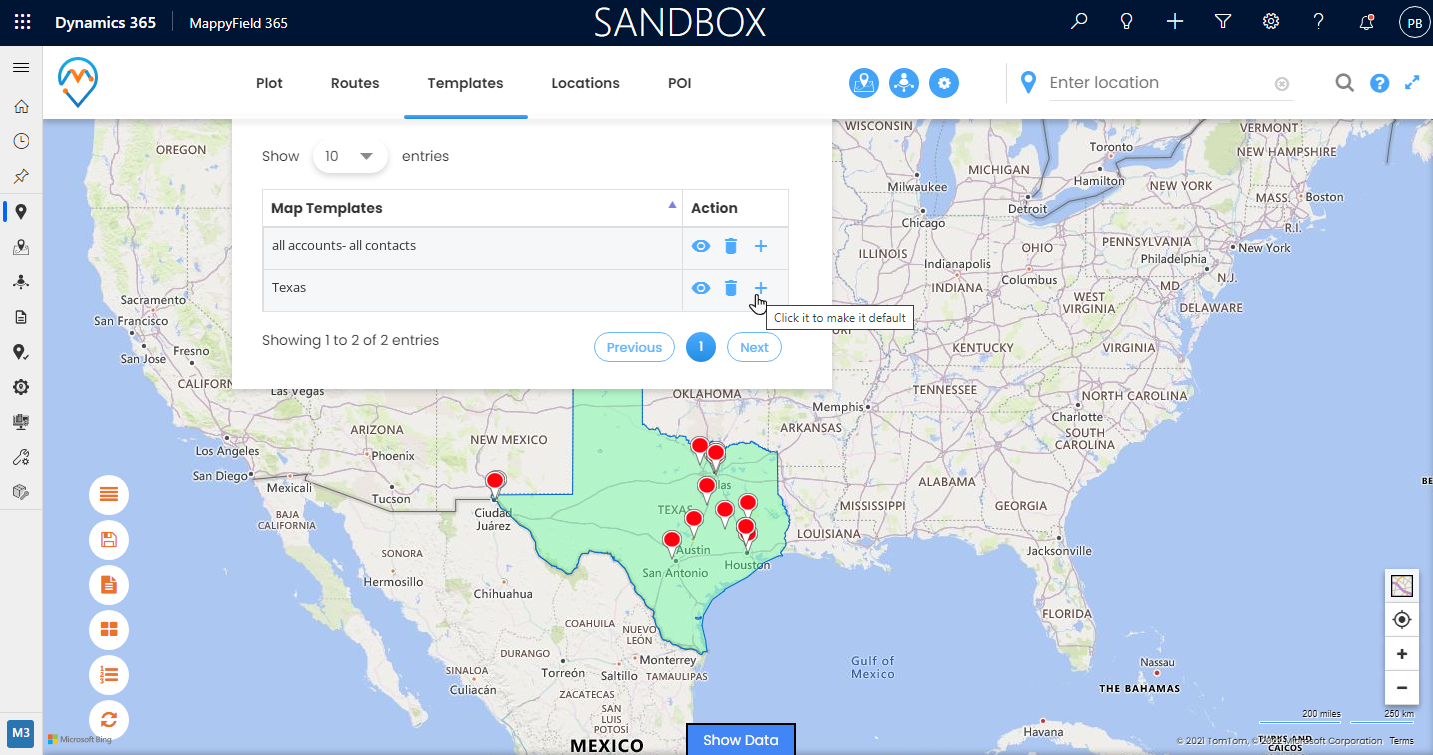
You can set only one template as the default template. So when the map is loaded, you will see the plotted records as per the default template.
In this way, the templates feature of dynamics 365 field mapping helps you save map configurations so that you can come back to them later and tweak them according to the requirement.
AppJetty MappyField 365 is a Dynamics CRM Map integration plugin that helps to plot your CRM data on the map. Using MappyField 365, CRM users can get detailed information about their market geography and prospective locations.
If you want to know about any feature regarding AppJetty MappyField 365, feel free to reach out to us at sales@appjetty.com or you can just click on “Contact Us”.
All product and company names are trademarks™, registered® or copyright© trademarks of their respective holders. Use of them does not imply any affiliation with or endorsement by them.
The Article is originally published on: