When you are managing the CRM users (teams) and the CRM activities from the MS Dynamics 365 CRM, you need to track the CRM activities and entity records as per scheduling dates. If you have Dynamics 365 administrator rights, you can check the activities from the default Dynamics calendar and manage accordingly. There are some limitations to check and manage all the activities and especially entity records from the default dynamics calendar.
AppJetty Calendar 365 is the plugin of Microsoft Dynamics 365 CRM that provides the custom calendar to get the CRM activities and entity records in one place. You can not only track and manage the CRM activities but also get the entity records on the custom calendar of dynamics 365.
If you are a CRM user with Dynamics CRM administrative rights, you can customize and configure the “Entity Calendar” separately as per your requirement. So, if you are a sales manager or marketing manager, you can manage the entity records by configuring any entity from the Calendar 365 configuration. Using an entity calendar, admin can also get the activities of entity’s record in the calendar.
In this blog, we have explained how to configure the entity calendar for the Dynamics CRM entity records.
Step 1: Navigate to the AppJetty Calendar 365
Click on “Calendar 365” from the apps list and navigate to the custom calendar of Calendar 365.
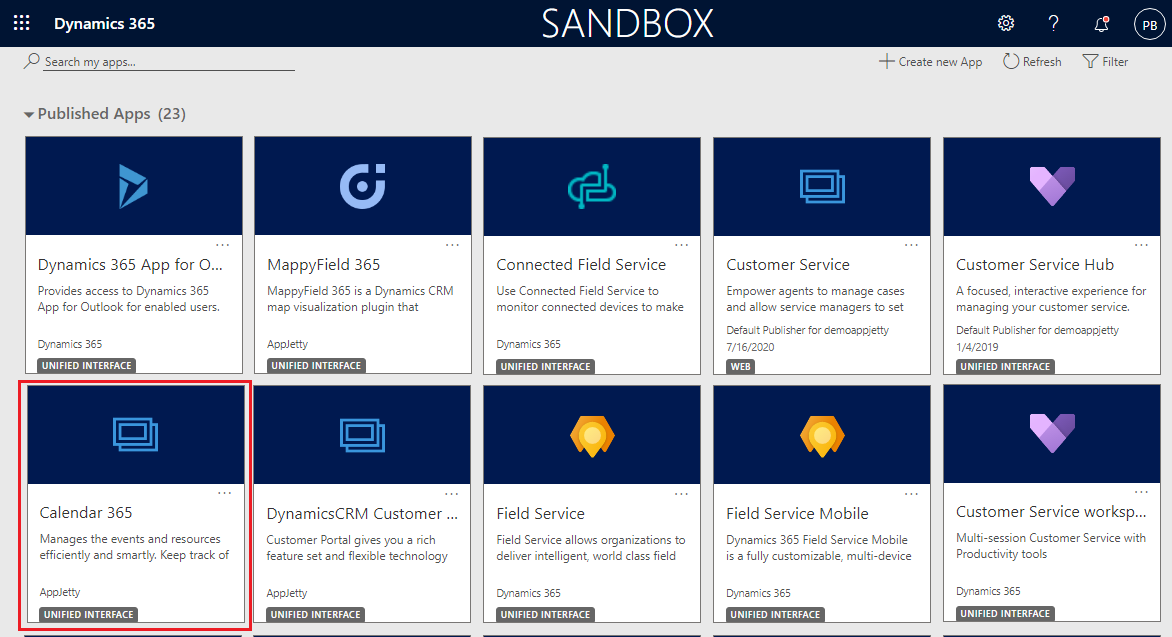
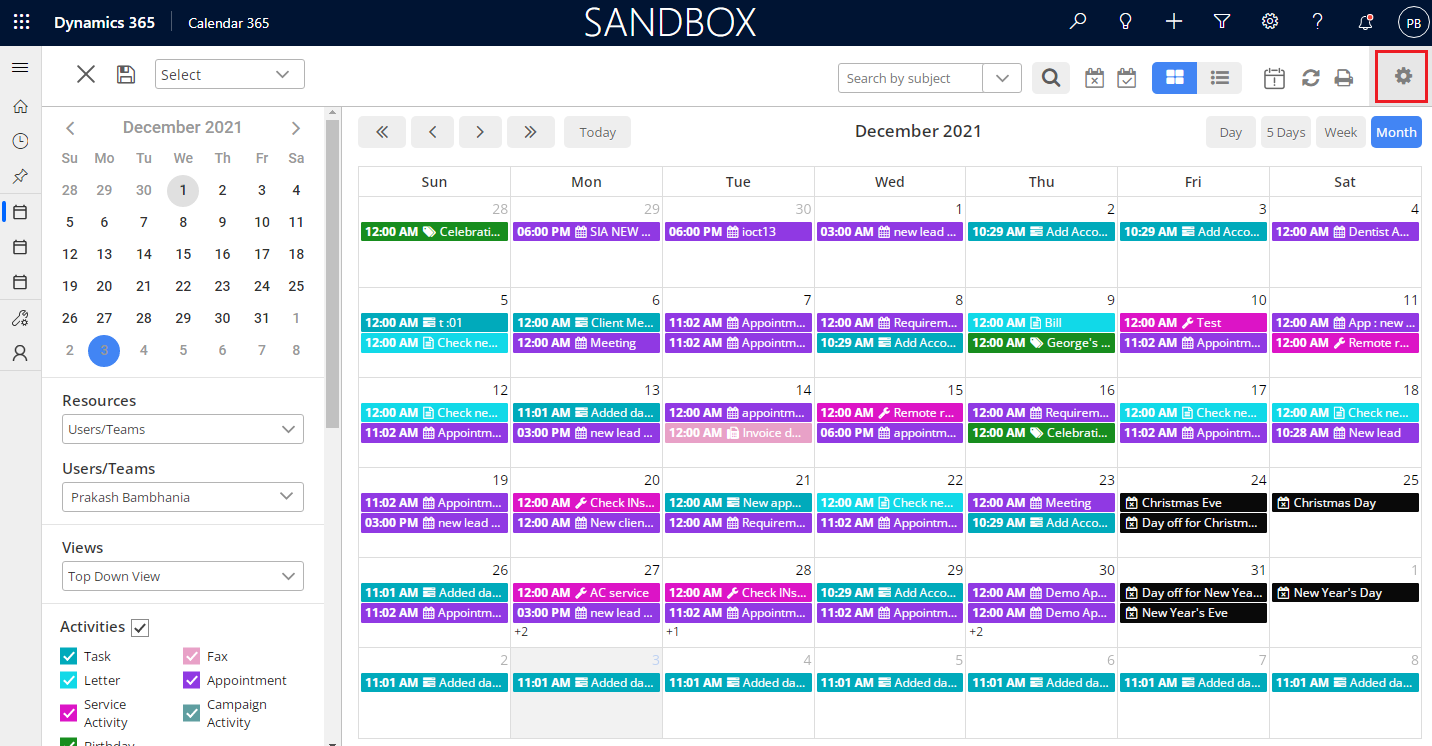
You will navigate to the custom calendar of Calendar 365.
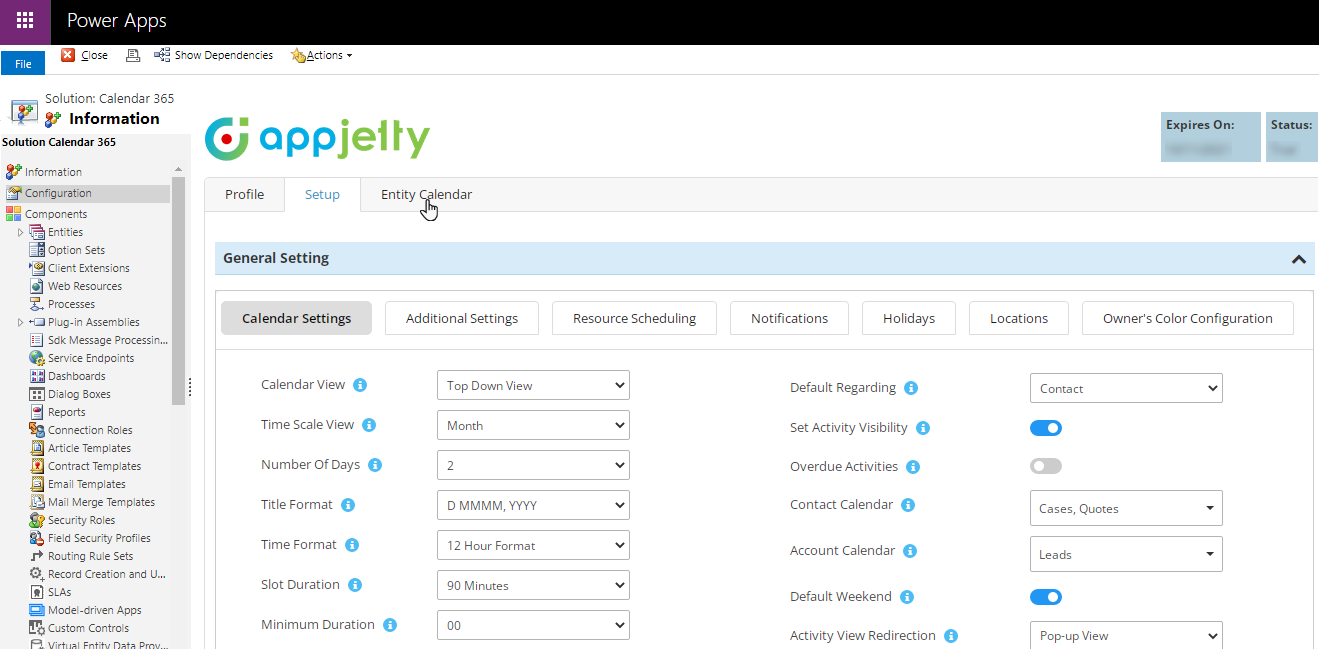
From the top-right side corner, you will find the ‘Settings’ (gear) icon to configure Calendar 365 settings. You can open the “Calendar 365 Configuration” tab by clicking on the ‘Settings’ icon.
Step 2: Open Calendar 365 Configuration
There are 2 ways to open Calendar 365’s configuration page:
- From Calendar 365
If you are on the custom calendar of Calendar 365. you will find a gear (settings) icon from the right top corner. By clicking on it, you can navigate to the ‘Configuration’ page.
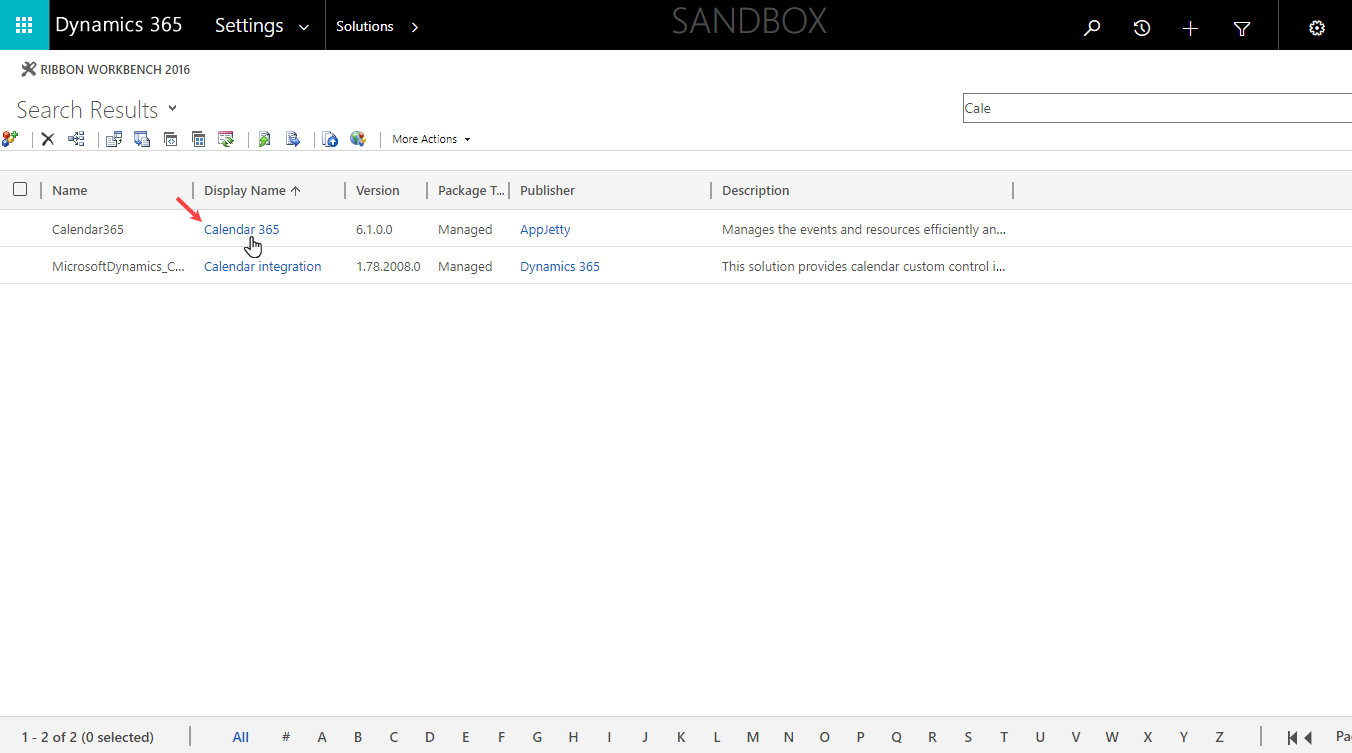
- Open Calendar 365 configuration from “Solution”. (Dynamics 365 Settings → Solutions)
Step 3: Entity Calendar Configuration
By clicking on the Entity Calendar tab,. you will get two options: “Views” and “Configure Entity For Calendar”.
Step 3.1: Views
You need to configure the default views of the Entity Calendar under the ‘Views’ section. You can define the view of the Calendar by configuring the individual setups/options.
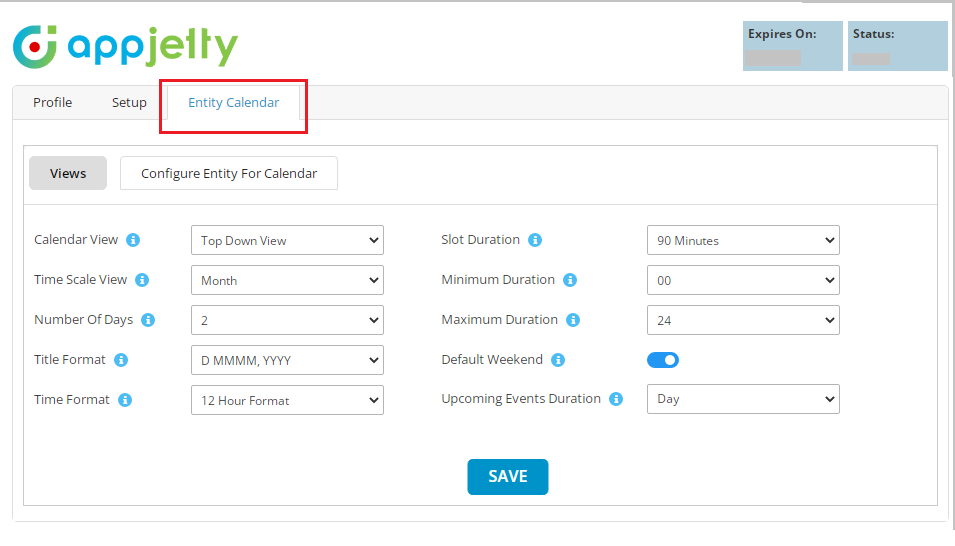
You can set the default views and options for the “Entity Calendar”:
> Calendar View > Slot Duration
> Time Scale View > Minimum Duration
> Number Of Days > Maximum Duration
> Title Format > Default Weekend
> Time Format > Upcoming Events Duration
Step 3.2: Views
Now, after selecting the default views and options for the Entity Calendar, you need to add and configure the entity to display the entity records in the calendar.
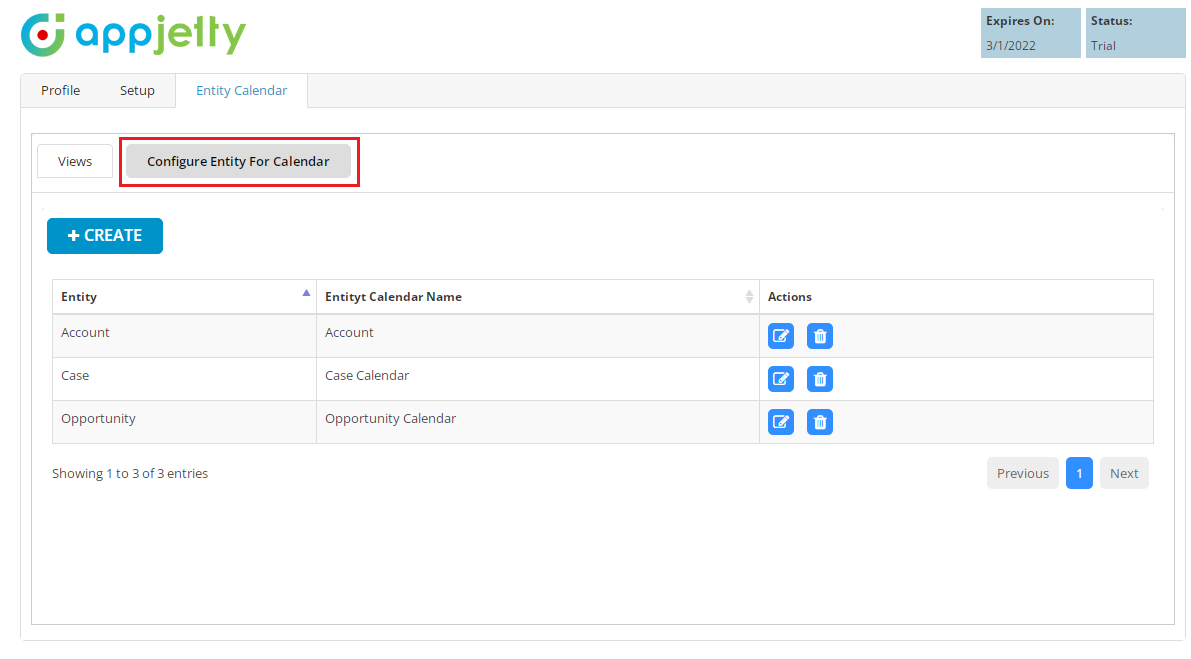
By clicking on the “Configure Entity For Calendar”, you will get the added entity. By clicking on the “+ CREATE” button, you can select the entity and configure the following details.
– Entity: Select entity whose record you want to see in entity calendar 365. The ‘Case’ entity is selected
– Entity Calendar Name: Insert the relevant name for the selected entity.
– Default Color: Set the color for the entity’s record.
– Overwrite Color With: Overwrite any color as per the entity’s field. You can select Overwrite Color as By Status & By Priority.
– Tooltip Attribute: Select the attribute which appears as hover details of the entity’s record on the calendar.
– Details Attribute: Select the attributes that will appear as details on clicking the records on the calendar.
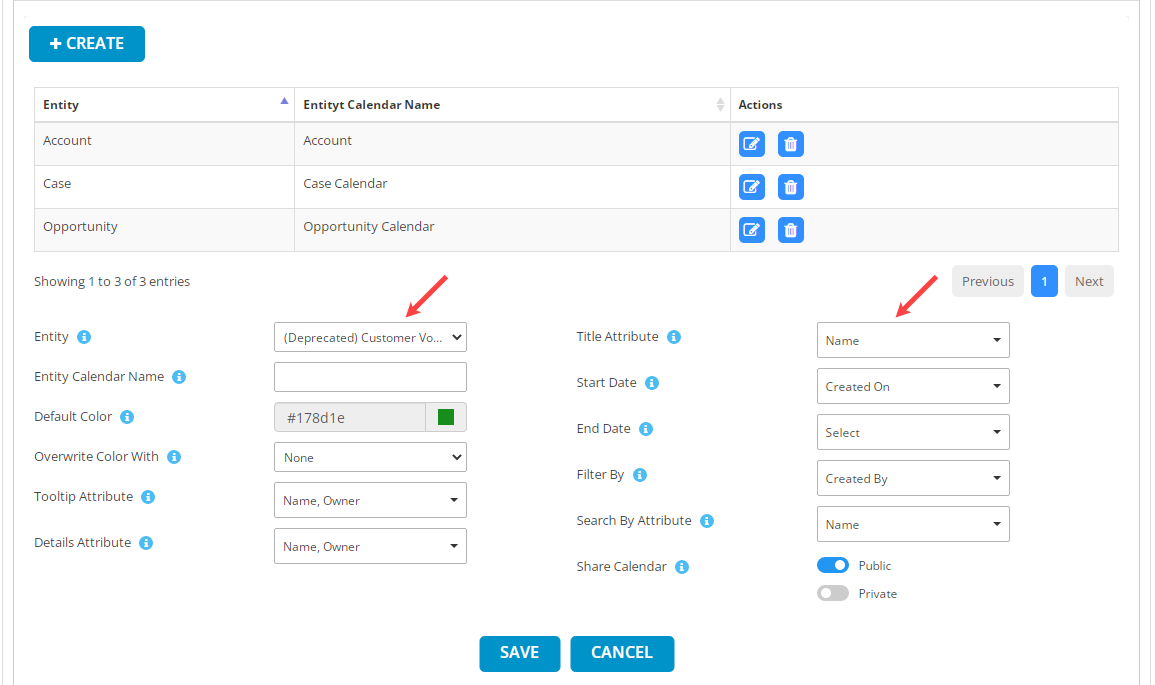
– Title Attribute: Select the title attribute to be displayed as the title of entity records in the calendar.
– Start Date: Set the date based on what you want to show on the calendar.
– End Date: Set the end date for the entity’s record. It’s optional.
– Filter By: Select the field on which you want to filter out the entity’s record.
– Search by Attribute: Select the attribute on which you want to search record.
– Share Calendar: If you select public it will reflect in all users. If you set it private it will show a drop-down of users so selected users can only access that entity’s calendar from Entity Calendar.
Now Click on the Save button to save the entity configuration.
Step 4: Calendar 365 → Entity Calendar
Now, you and your team members (CRM Users) will see the Entity Calendar as per the default views and options. You will get the entity records as per the Entity Configuration for the calendar.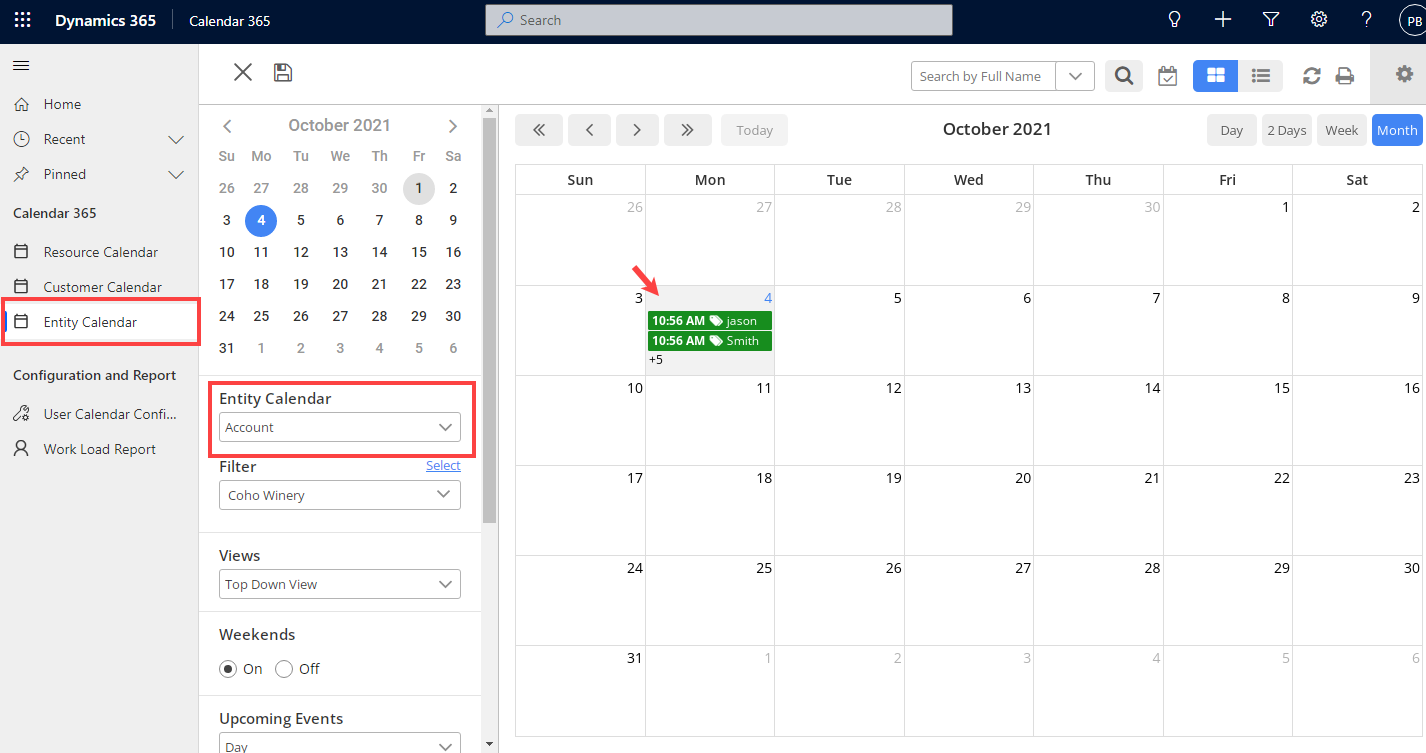
You will get the configured Entity list from the “Entity Calendar” drop-down. By selecting the required entity, you can check the entity records
In this way, you can configure the Entity Calendar and check the entity records from the separate “Entity Calendar”.
MS Dynamics 365 CRM plugin AppJetty Calendar 365 provides many functionalities to manage and track the CRM activities from the custom calendar of Calendar 365. Admin users will have many configurations to manage ongoing/upcoming activities like Appointments, Calls, meetings, etc. They can set the default calendar view and check all the activities in the list view as well.
If you want to know about any feature regarding AppJetty Calendar365, feel free to reach out to us at sales@appjetty.com or you can just click on “Request Demo”.
The Article is originally published on:
https://www.appjetty.com/blog/how-to-configure-the-entity-calendar-in-dynamics-365-crm-custom-calendar-plugin/